Hello, Blogger
aaj hum janege ki apne blog ya site me popular post widget kaise add karate
hai.
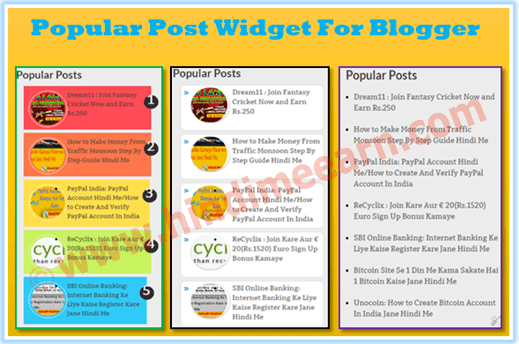

Popular Post Widget Kya Hai?
Popular post
widget yane humare site par jo popular post hai unhe dikhane ke liye hota hai.
Ise apne blog pe add karane se visitor use post ko padh sakate hai jo sabse
popular hai. Ye widget add karane se aapka blog ka look professional site ki
tarah dikhayi deta hai.
Aaj mai aapko 3
types ke popular widget dikha raha hu isme se aapko jo accha lage use aap add
kar sakate hai.
Simple Popular Widget Kaise Add Kare?
Niche di gyai
step ko follow kare.
Step 1:
Blogger.com pe
chale jaye waha se apne blog ke dashboard me chale jaye.
Step 2:
Niche Layout me
chale jaye aur waha se add widget pe click kare.
Step 3:
Pop-up windows
khul jayegi. Aapke samane bahut sari widget hongi waha se popular post widget
select kare.


Step 4:
Ab aapke manae
popular post widget ki setting ka page khul jayega jaise niche image me dikhaya
hai.
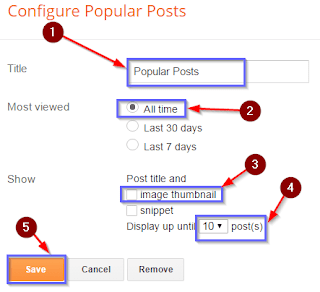

Configure
Popular Post is tarah dikhayi dega.
1. Title: Aap jo title rakhana chahe jaise “Popular Post”, “All Time Hits
Post”, “Top Most Article” is tarah aap jo chahe wo dal sakate hai.
2.Most Viewed: Me aap yaha se konsi post ko dikana chahate
hai yane all time popular, ya last 30 din me popular hui ya last 7 din me
popular post ko select kare.
3. Show: Post
title and
Image thumbnail: Agar aap post title
ke sath uski image dikhana chahate hai to ise tik mark kare.
Snippet: Agar aap post title ke sath kuch
post ki line bhi dikha sakate hai.
4. Display Up Until:
Yaha se aapko
kitnai popular post dikhani hai jaise 5,7 ya 10 ye select kare.
Save par click
kar de. Aapke blog pe popular post widget add ho chuki hai wo kuch is tarah
dikahyi dega.
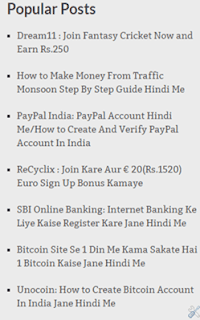

Ye to ho gaya
simple widget ye to koi bhi add kar sakata hai par hume ise attractive karana
hai.
Multi Colored Popular Post Widget Kaise Add Kare:
Multi colored
popular post widget add karane se 100% user aapke post ko read karane ke liye
attract ho jayege. Is par aapko post ke sath-sath post number bhi dikhayi dega.
Upar di gayi
setting kar le uske bad maine jo niche step di hai use follow kare. Step follow
karane se pahale apne blog ka backup lena na bhule.
Step 1: Blogger
ki dashboard pe chale jaye phir niche template me chale jaye.
Step 2:
Template ko edit html me open kare.
Step 3: Phir apne
keyword pe Ctrl+F dabaye aur usme ]]></b:skin> is code
ko find kare.
![]]></b:skin> Find Kare ]]></b:skin> Find Kare](https://blogger.googleusercontent.com/img/b/R29vZ2xl/AVvXsEhF3qj7geXlEz_W-GXUDrwk0w0K4UJzi0NraC08gv7qxnzbFEahIMN7UYBYEdPe_eE-oNXoiz094XkWAr5jY2kMt-EKmygh71FeJgDfWdORjJo_wCUehac9KACSlX_hhN4GfJXdsvcqBng/s640/code-copy-kare.png)
![]]></b:skin> Find Kare ]]></b:skin> Find Kare](https://blogger.googleusercontent.com/img/b/R29vZ2xl/AVvXsEhF3qj7geXlEz_W-GXUDrwk0w0K4UJzi0NraC08gv7qxnzbFEahIMN7UYBYEdPe_eE-oNXoiz094XkWAr5jY2kMt-EKmygh71FeJgDfWdORjJo_wCUehac9KACSlX_hhN4GfJXdsvcqBng/s640/code-copy-kare.png)
Step 4: Niche
do code diye hai usme se aapko jo pasand hai use copy kar le.
Code 1:
Is coding ke bad ye kuch is tarah ka dikhayi dega.
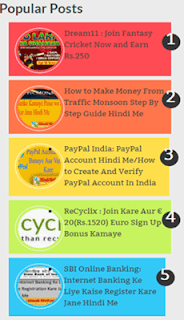
Code 1:
Is coding ke bad ye kuch is tarah ka dikhayi dega.
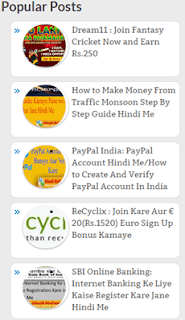
Step 5: Code ko
]]></b:skin> is code ke upar kahi par bhi paste kar de aur
template ko save kar de.
Aap ne successfully
multi-color popular widget add kar liya hai. Is widget ko customize ya edit
karana chahate hai, aur agar aapko isme kuch problem ho to niche comment karana
na bhule.


0 Comments: